
In the previous tutorial, we have completed installing the SAP NetWeaver 7.3 on ABAP. Now, on this tutorial, we are going to install the SAP NetWeaver 7.3 on JAVA.
The installation will be on Windows Server 2008 R2 and MaxDB database.
Prerequisites
• You have installed the Windows Server 2008 R2.
• Obtain the following files from SAP Service Marketplace.
MaxDB RDMS (51942312_14)
JAVA export (51043284)
Sofware Provisiong Manager (SWPM – Get the latest available)
SL Controller 720 (51047209_8)
UC Kernels (51044252_4 / 51047209_6)
MaxDB Database Studio
• Extract all the required files.
Installation
Run the sapinst as Administrator from the SWPM folder.

Navigate as following (based on SAP NetWeaver 7.3, MaxDB and Java).
SAP Installation Master > SAP NetWeaver 7.3 > MaxDB > SAP Systems
> Application Server Java > Standard System > Standard System
Choose Custom.

Locate the required Java component.

Determine the Usage Types. You can refer to the Master Guide for details explanation on each User Types. Some user types are dependent on another user types.

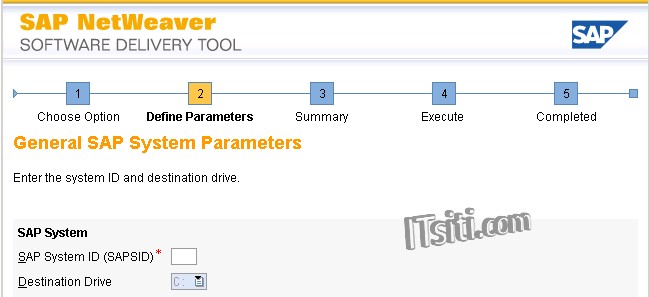
Define the SAP system ID.
Set the FQDN and DNS Domain Name for the SAP system. Else, deselect the option and click Next.

Locate the UC Kernel NW73 and RDMS MaxDB.

Enter the Master Password.

Choose the Windows domain – If no domain maintained, use Local Domain.

Click Next (use Master Password).

Enter the MaxDB system ID. (Recommended to use the same name as SAP system ID)

Choose Local Domain.

Click Next (use Master Password).

Click Next (use Master Password).

Enter the MaxDB database instance parameter. You can use the default value. The value can be increase afterward.

Specify the MaxDB Log & Data Volumes. You can accept the default value. The value can be increase afterward.


Click Next (use Master Password).

Click Next (use Master Password).

Enter the PAS and SCS instance number. Select Automatically for number of Java nodes.

Accept the default value of Internal Java message server port and Transport Host.

Click Next (use Master Password).
Select the data source for users and groups to be used by the Java application server. In this activity, we have selected Use External ABAP System.

Enter the connection parameters for the external ABAP system. All the users must be exists on the ABAP system.

Specify the location of JCE Unlimited Strength Jurisdiction Policy Files Archive. Download the file from the Oracle website.

Enter the location of SL Controller.

Accept the default value. Click Next.

Define the Diagnostics Agent SID.

Choose Local Domain.

Enter the passwords of the operating system users.

Enter the Diagnostics Agent instance.

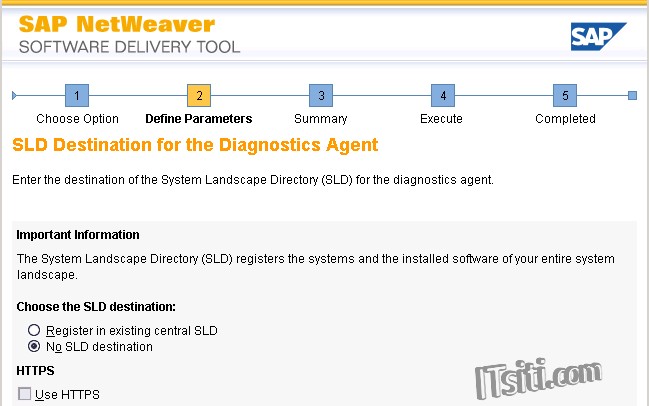
Enter the SLD destination for the Diagnostics Agent. If none, select No SLD destination.
Accept the default value, click Next.

Specify whether you want to integrate your SAP system into the NWDI landscape. If not, deselect the option and click Next.

The parameter configs are done – You are now in the last screen before the installation begin. In this screen, you may need to verify all the entered parameters earlier. For changes, click on the check box and select Revise. Else, click Next to start the installation.

The installation begins.

Yes. It’s now complete. Once done, you can proceed to do the post installation steps.


